Good afternoon and thanks for joining me this Thursday afternoon.
Yesterday it was workshop day in Hazel Grove and we went Christmas crazy making cards ready for the festive season. Unfortunately our Birthday girl couldn't be with us ....so we ate her cake .....
After sending her this photo.....and yes It was a dare!!!!! ( workshop calendar coming out soon....lol....)

Oh we have such a giggle.....but then life is so much better when you smile...don't you think....?
Thanks Julie for the yummy cakes...
And as for the afternoon crew well all I can say is the camel was in the building .....wasn't it Eileen????
Onto today....I have a special blog step by step for my lovely friend Donna...
This is a card that we made in Cumbria...

And here is how we made it, I must admit the design came about quite by accident...it was an idea that went wrong....but then it turned out right in the end....just shows you....sometimes you just need to keep on joining ...

Start by stamping the lovely Papyrus stamp from Clarity...

Turn the card around and stamp again...leaving a small gap.
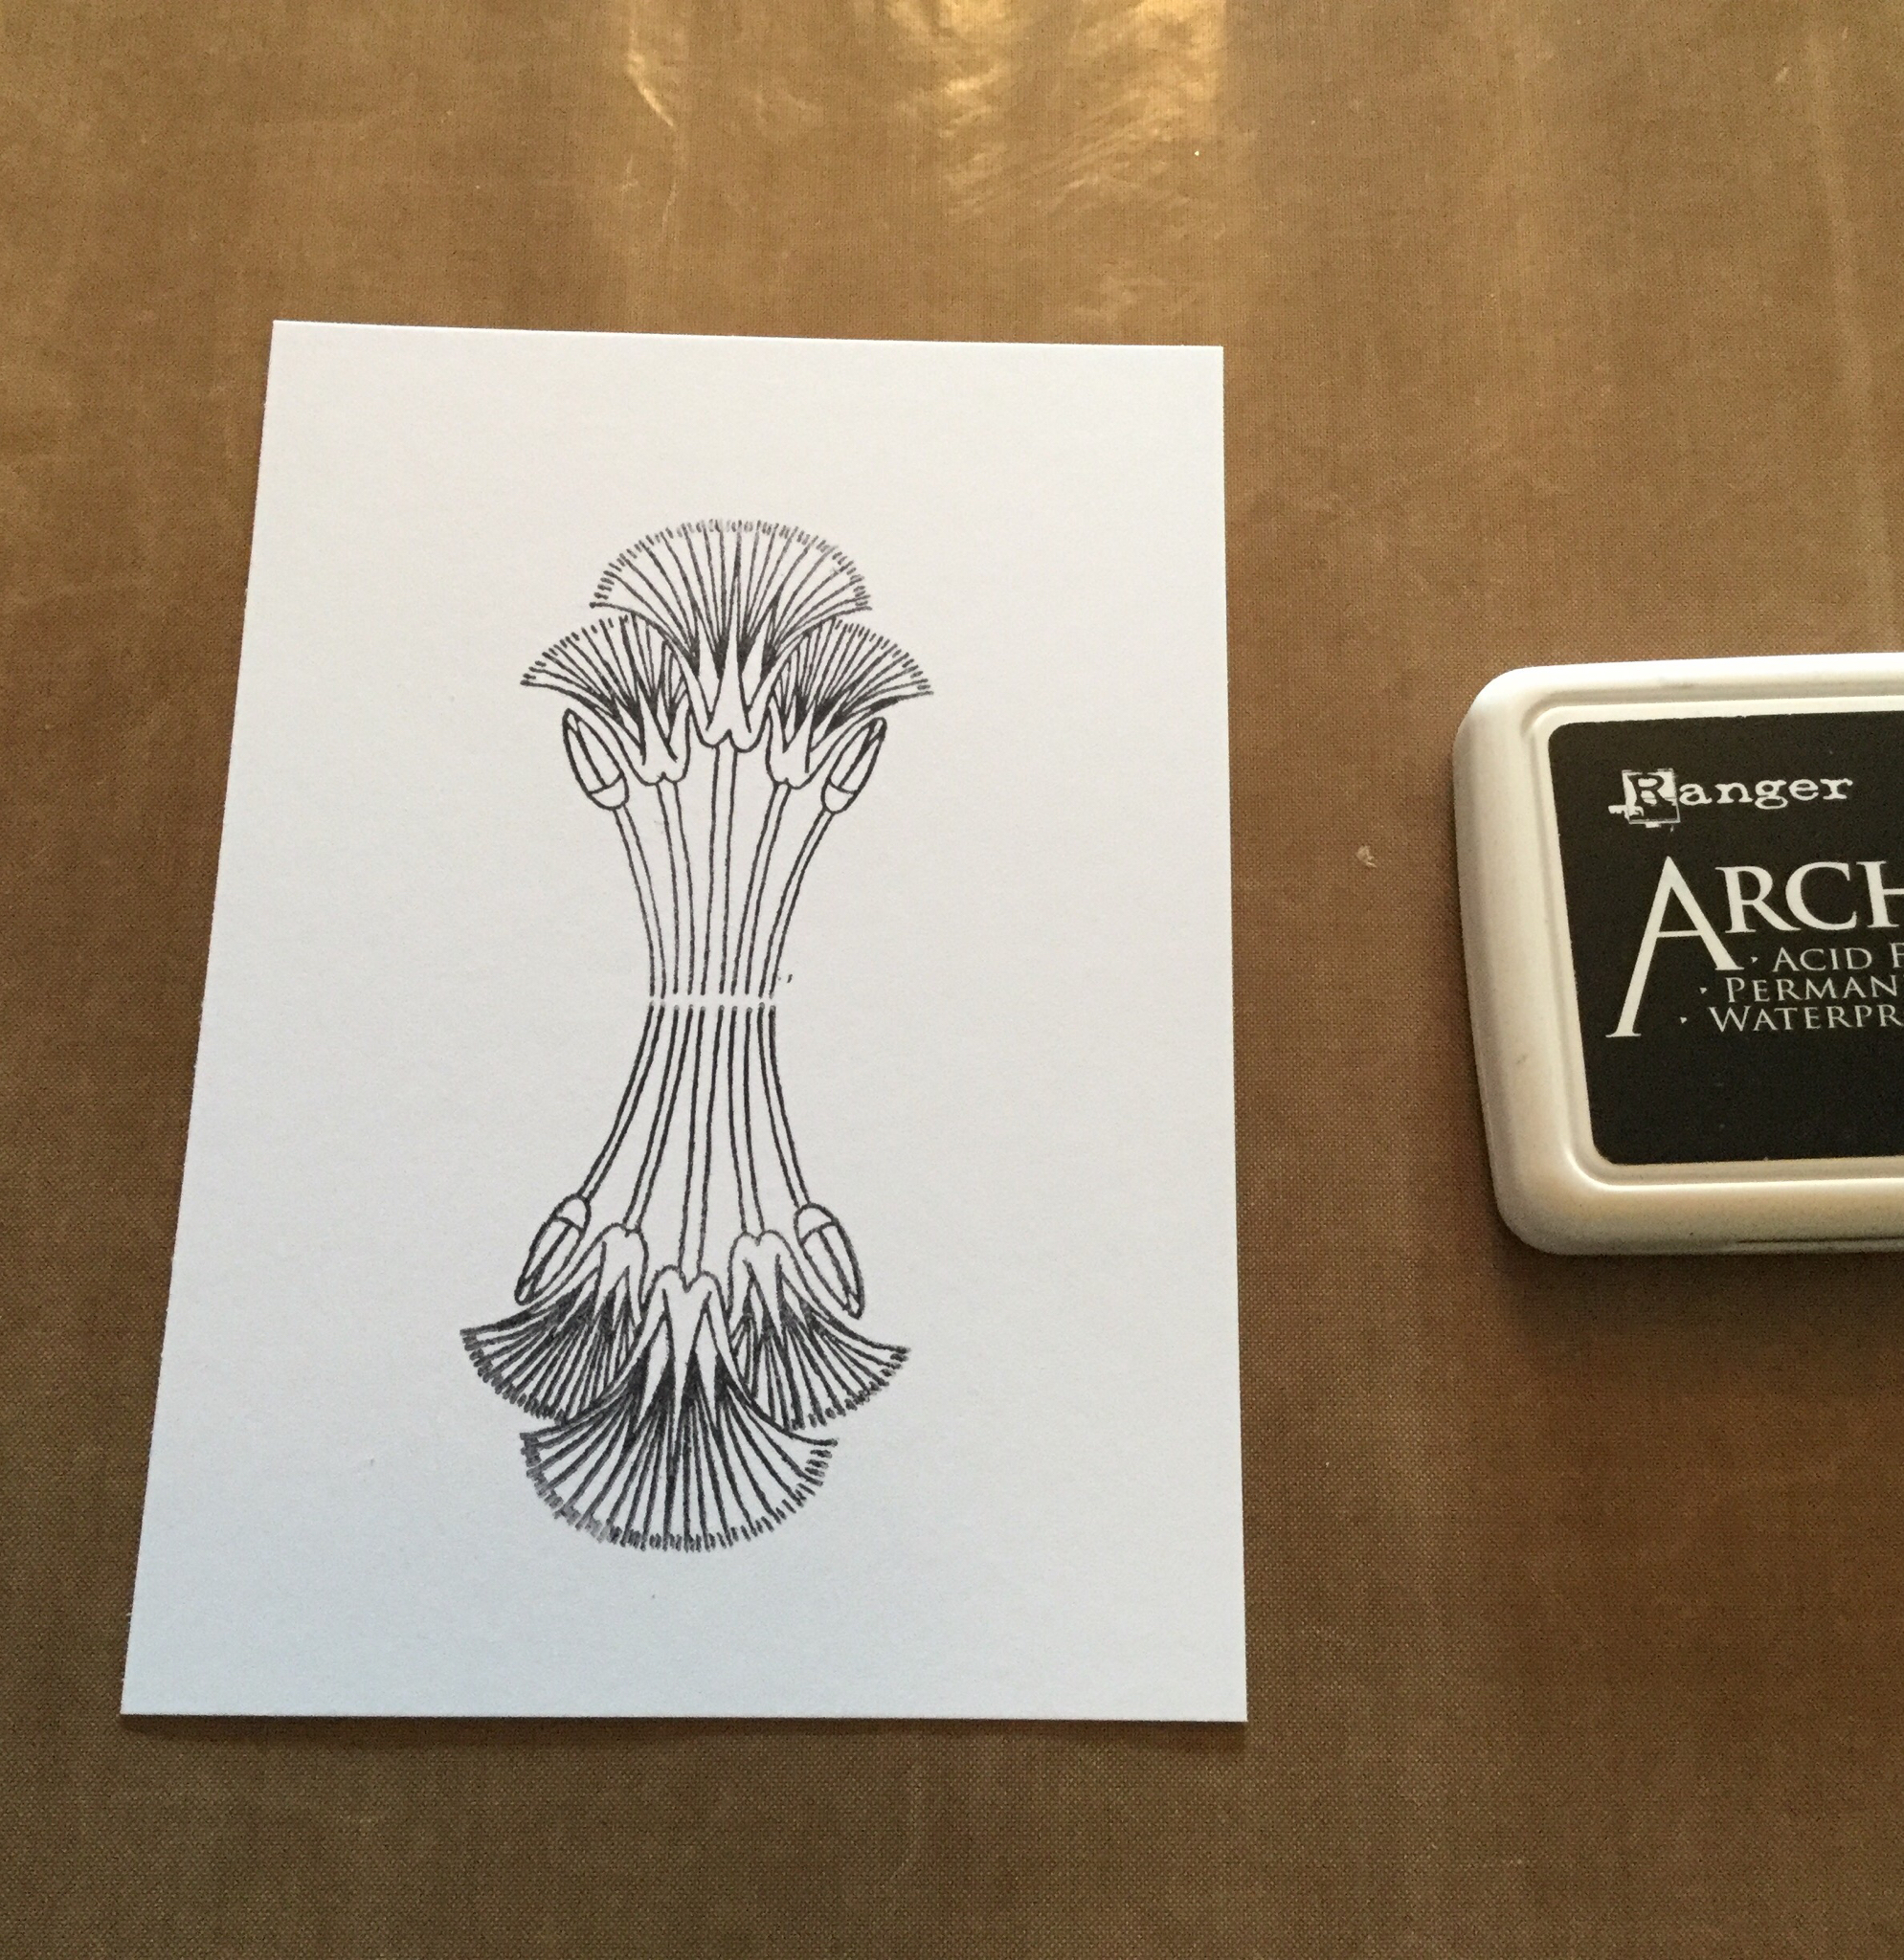
Next mask off to the middle...

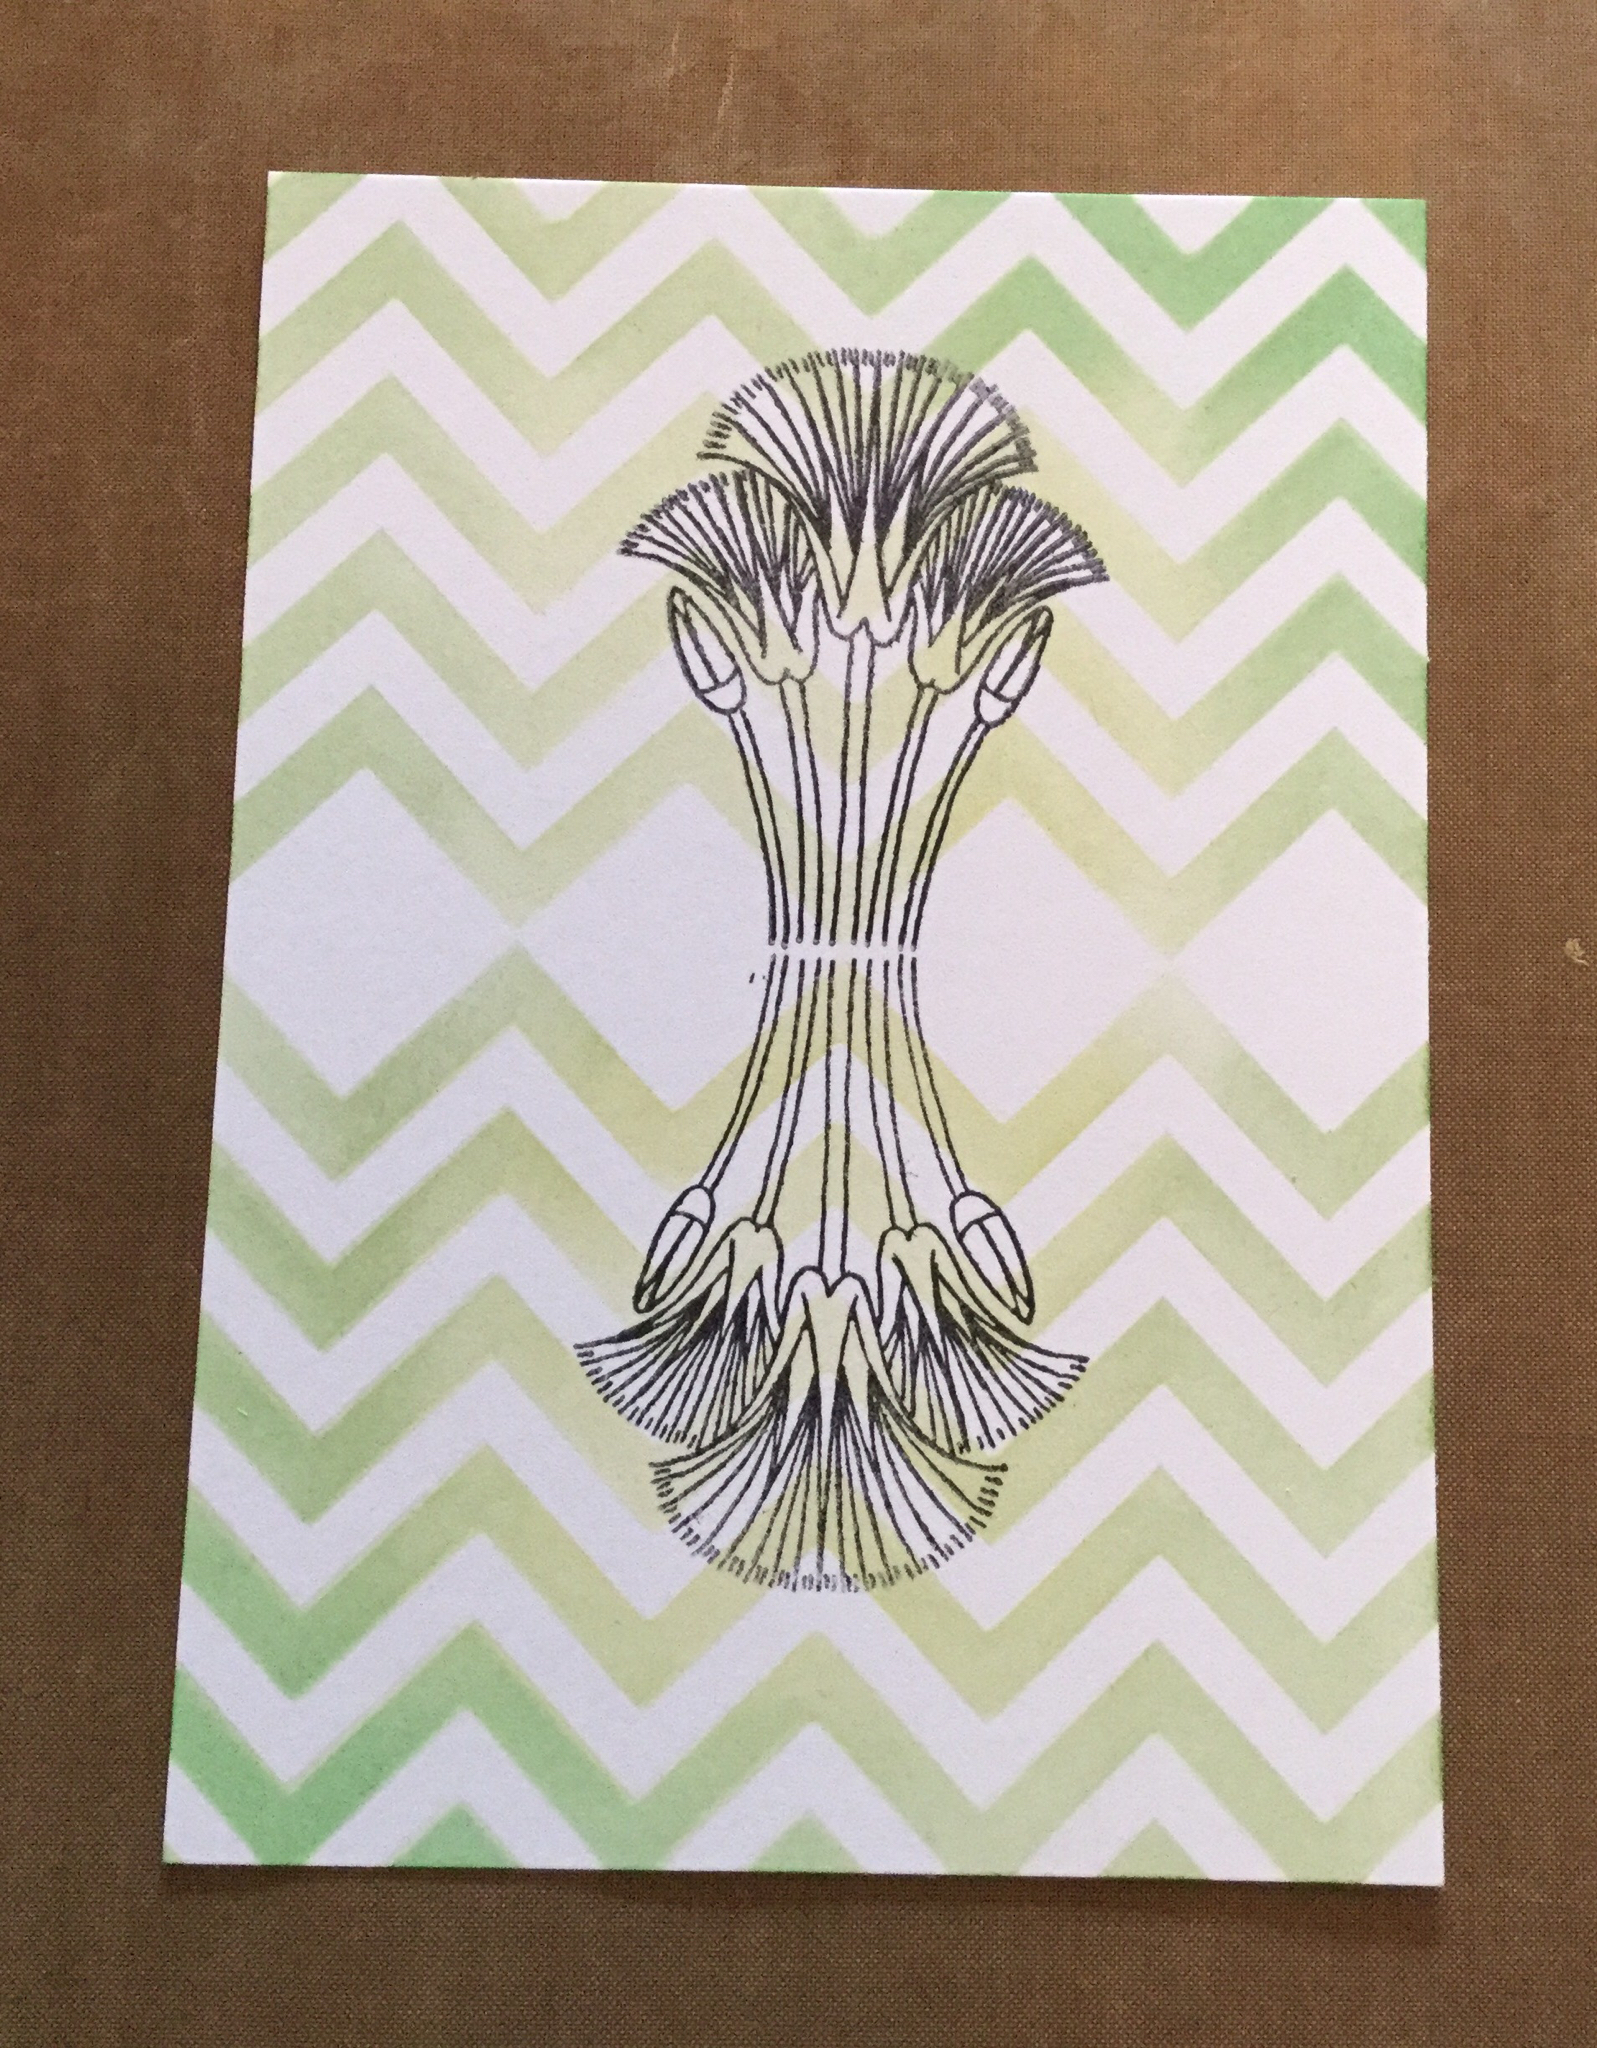
And add the stencil....making sure that the middle off the stencil is in the middle of the flower.

Start in the middle section with Lettuce Adirondack ink.

Add Meadow around the edge..

And then finish off with Cracked Pistachio in the top right hand corner.

Remove the stencil...

Don't worry about inking the flowers , you won't see this when we have coloured them...
Turn the card around again....and repeat the process

Mask off.

Add the stencil, and then the inks...
Remove the Stencil
Add some Black sharpie pen around the edge....also my latest fad....faux bakers twine....

Now....I bet you are saying...what about the gap in the middle? ( and that black mark!!! There is always one )
Well simple...

Just draw in a thread and bow with your black fine liner pen..

And colour the flowers with your Spectrum Noir pencils.

Add it to a card blank....

And job done.....
I do think this would make a lovely design for a set of say Thank You cards....as the Papyrus design looks fab in different colours.
So Donna , I really hope that helps....
Also if you still need the Snow Globe Die...Glynis at CJ CardCrafts has some in stock and is happy to post them out.....just call her on 0161-477-7027
Well , my soup maker has just finished so time for a late lunch...
See you soon.....
Much love and hugs,
Jo. xxx
10 comments:
Love this card , must try this ,,xx
Yay Jo! What a star, I really love this reflection effect and am so pleased you have blogged it. I honestly thought you must have used masking and a gelli plate! I will put my crafty 'L' plates back on! This stamp will have to go on my next order as I really like the style. Will phone CJ cards tomorrow for a snowglobe die! THANK YOU Jo! Xx
A love card Jo and thanks for the step by step. I may try this one but with a different stamp. X
Lovely design Jo xx I like yer buns!
wonderful work Jo - and the cakes look fabulous too - not sure about a calendar though - lol!!! Hugs rachel xx
oh so no tassles today then eh? great tutorial, hugs xx
My pleasure Donna, thanks for your continued support with my little blog...xx
Looking forward to seeing the results....xxx
What are we to do with you Jo? You are incorrigible. But if you weren't we would all be the sadder for it. You make us laugh and share your remarkable talent all the time. That is why we all love you. Take care & enjoy Saturday at CJ Cardcraft. (hugs) xx
Love learning from you Jo, you always have such great ideas. Xx
Post a Comment