It certainly has and it started on Friday with a few hours playing...oh sorry, preparing for Saturdays workshop at C.J.Cardcrafts in Edgeley, Stockport.
I used one of the fantastic new Clarity Stencils.....well I do love Poppies....
I started by loading my Gelli plate with a pale colour of Adirondack ink using my Brayer. I then used scrumpled paper and took a print. Added two contrasting inks and one of the outer square stencils....rubbed with copier paper, took the stencil away and took another print....this is a really good way to build up layers on a background.
When I was happy with my background, I placed my poppy stencil onto the Gelli plate and began to dab Adirondack ink through the stencil using a makeup sponge....
I removed the stencil and took my final print....I was really happy with the result, so I made it into a card.....I do hope that you like it too.
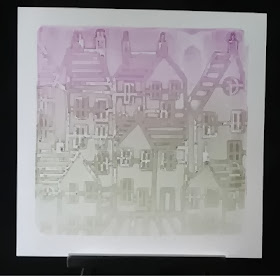
Here are some other examples using the Gelli plate, inks and Clarity Stencils...
And..
On to the workshop projects....we had some warm up exercises using copier paper...I really do recommende this...and once you start, honestly you won't want to stop...
We used the Clarity Treescape stencil and the stamps are from the remountable hares set....
Then onto a more arty approach to the Gelli plate (just for you Sam).
I do hope you like these projects, the crafters all took to the Gelli like ducks to water...(and believe me we have a lot of water about at the mo...)
Thank you for looking in today...enjoy your Sunday evening especially you Linda Page!!!! I know what you will be doing at 9pm.......Enjoy...
Hugs from me....xxx


Blooming lovely Jo! I will make one of your classes one day! Xxxx.
ReplyDeleteOh that would be brilliant Mandy...x
DeleteOh my word these are my favourite Gelli prints ever along with the print that Sam made on printed paper with the very same Poppy stencil. Think that means I need that stencil!!!
ReplyDeleteThey're so pretty and feminine. Can you tell I like them!!!!
So many beautiful gelli prints , I have the poppy stencil, untouched think it needs a bit of gelliplating .... your print looks so textured, I will follow your explanation word for word and see what I come up with xxx
ReplyDeleteThese are fabulous Jo. Gorgeous colours and loving the fabulous backgrounds.
ReplyDeleteHugs
Linda xxx
Love them all Jo, great projects x
ReplyDeleteWOW Jo...this technique intrigues me and I know nothing about it!!! You have created a BEAUTIFUL piece here!!! I will have to look into this technique!!!! Have a great weekend...what's left of it!!
ReplyDeletelove this poppy card. oh i do need to play with this stencil. all great projects Jo. hugs xx
ReplyDeleteThanks for your lovely comments ladies.....xxx
ReplyDeleteInspirational. Live your poppy card. Thanks for sharing x
ReplyDeleteThat should say 'LOVE' not live. Oops!
DeleteThanks Jeanette, and I read it as Love anyway....how funny.....xx
DeleteHa ha ha ha that made me laugh out loud Jo. These are all brill bet you had a fab time at your workshop and I am so glad Billy is get out a lot more these days xx
ReplyDeleteI thought it might Linda, .....and yes Billy is a happy Brayer at the mo.....xxx
DeleteFabulous prints, and just luscious colour!
ReplyDeleteLove it!! Wanna go play!!
ReplyDeleteThese are beautiful. I didn't know you could make such lovely pictures with a gelli plate. I will be trying it myself.
ReplyDeleteJo , stunners everyone.
ReplyDeleteHow do I find the stamps and stencils?
ReplyDeleteHi Denise all the stamps and stencils are from Claritystamps and can be found on their website here.......http://www.claritystamp.co.uk/. Hope this helps.....Jo. X
DeleteHi Jo just spotted you on the Gelli Art Page - great. What a brilliant way to use ink and Stencils on the Gelli Plate. Why didn't you tell me about it.?? Seriously its a great idea and works really well. Love it. xx
ReplyDeleteframemaster
ReplyDeleteBeen gelli weekend Pages are great.
educatewithtoys
ReplyDeleteHappy with the information that your website provides…..